
Have you ever wanted to add a personal touch to your emails in Outlook? Well, adding a signature is just the way to do it! A signature adds a professional look to your email and saves time in typing out your contact information at the end of every email you send. So, let’s dive into how to add a signature in Outlook.
Steps for Adding a Signature in Outlook
Adding a signature in Outlook is simple and can be done in just a few easy steps. Here’s how you can do it:
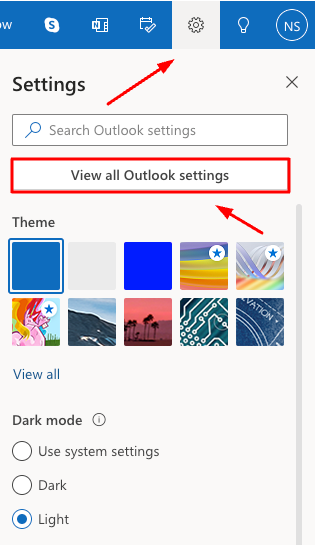
1) Click on the ‘Settings’ gear icon
Click the ‘Settings’ gear icon in the top right corner, then select “View all Outlook settings”.
2) Go to the settings window & click ‘Compose and reply’
In the ‘Compose and reply’ section, you will see an editor where you can design and input your signature.

3) Navigate to the ‘Email Signature’ section
To create an email signature, find the ‘Email signature’ section. Type your signature in the provided text box. Use the options above to change the font, size, color, and more. You can also add links, pictures, and even your business card.
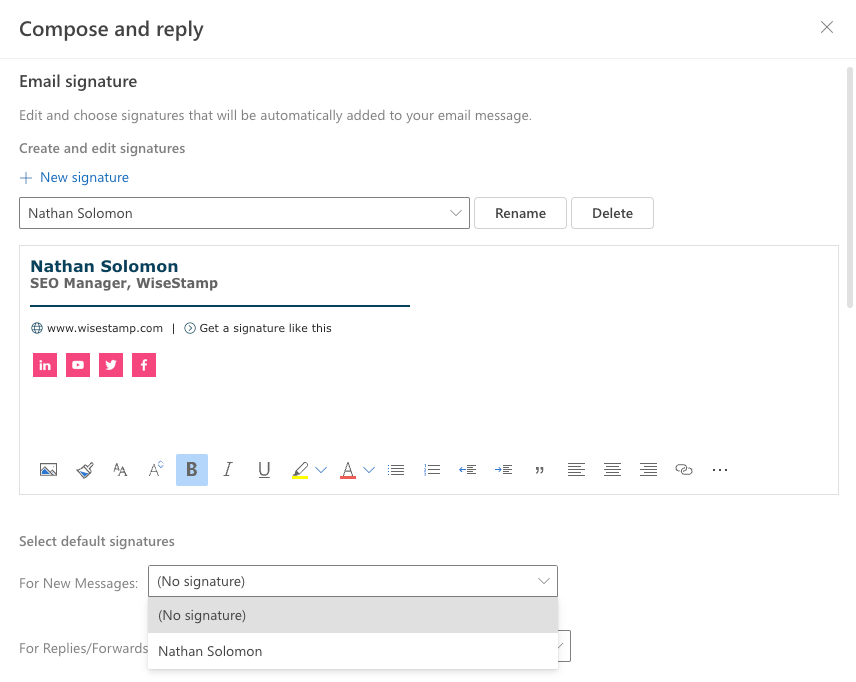
4) Make the signature as default and check the more options to consider
Choose the checkbox that suits you when you’re happy with your signature. Add your signature to new, forwarded, replied-to messages, or none.
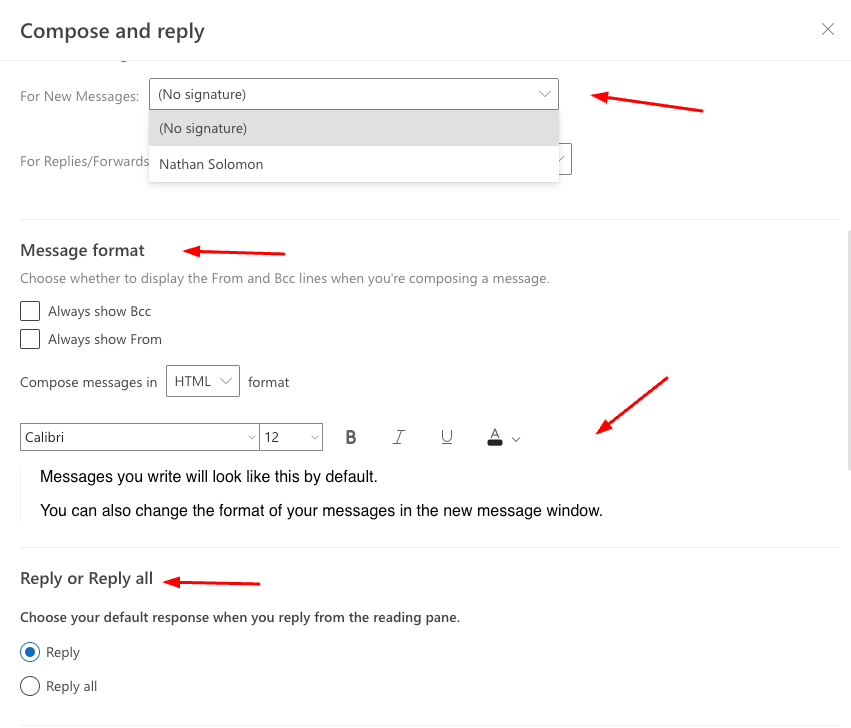
Remember to click ‘Save’ at the bottom of the page once you’re finished. Close the settings window. Your new signature will be displayed at the bottom of every email you send based on your chosen options.
Steps for Adding a Signature in Outlook for Windows Desktop
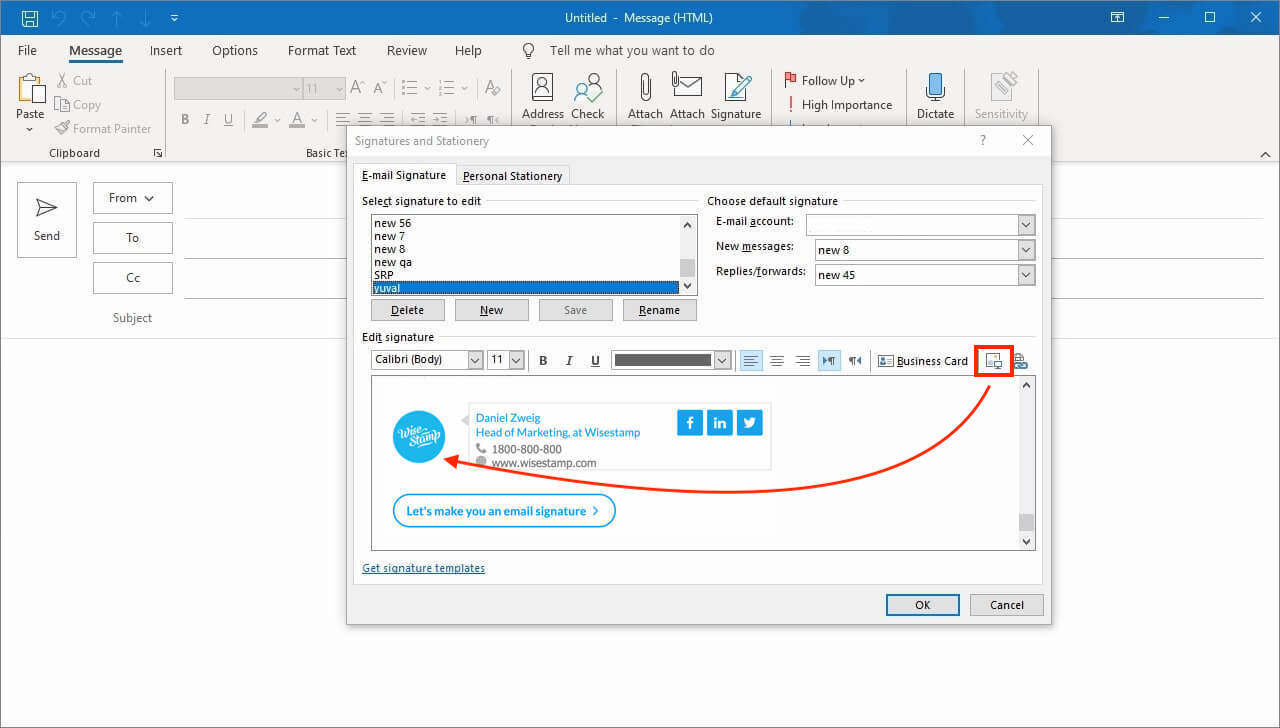
1) Open in-app editor of Outlook
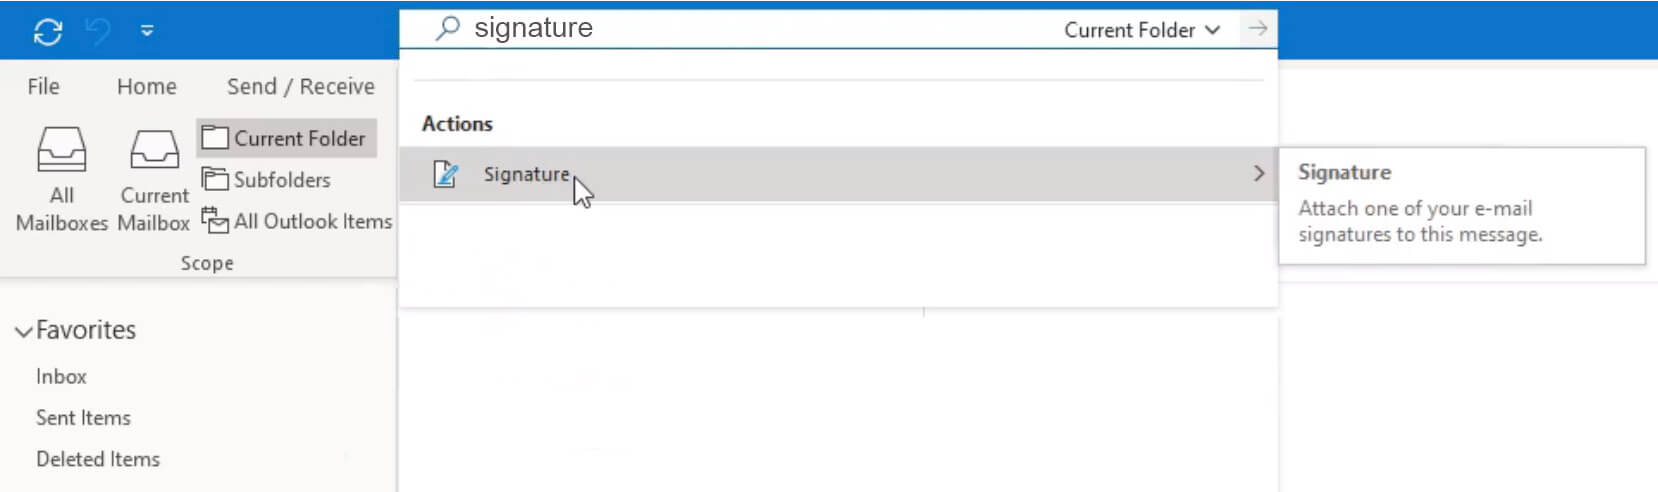
To set a signature in Outlook, follow these steps:
- Go to the search box at the top-left of your Outlook screen and type “Signature”.
- Click on the “Signature” result.
- Select “Signature” from the dropdown menu.
- Use the in-app signature editor to create your signature.
2) Create a new outlook signature
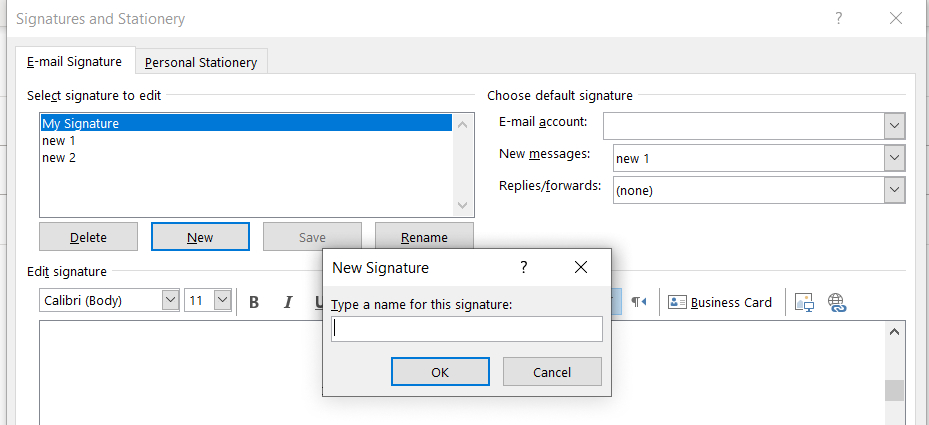
- To create a new signature for your email, click the “New” button.
- Give your signature a descriptive name that accurately represents it, especially if you plan on creating multiple signatures in the future.
3) Add your signature details
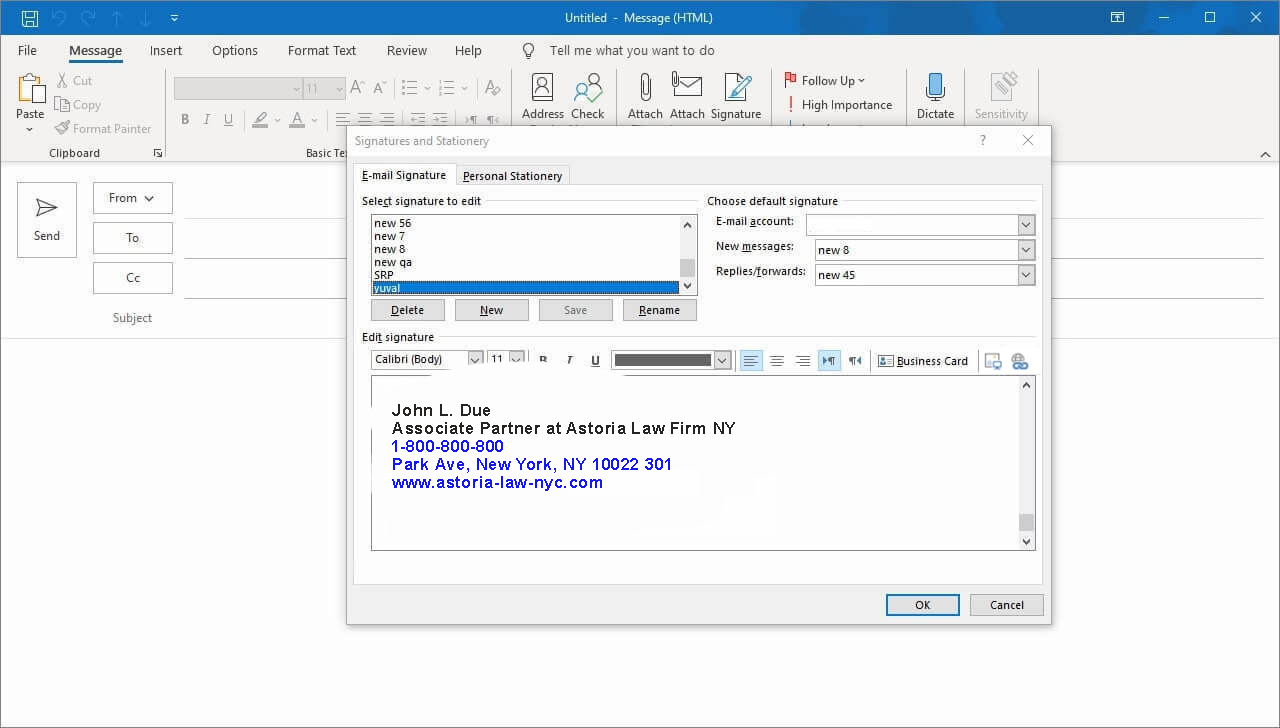
- First, start by creating a basic Outlook email signature using simple text. It may suffice for your needs. However, if you desire a more professional touch, we will guide you on creating a more impactful and effective email signature later.
- For creating your text signature, enter your full name, job title, and contact information in the signature editor’s text field. If you’re happy with this layout, click OK, and you’re done. For additional signature features, continue reading.
4) Edit signature design
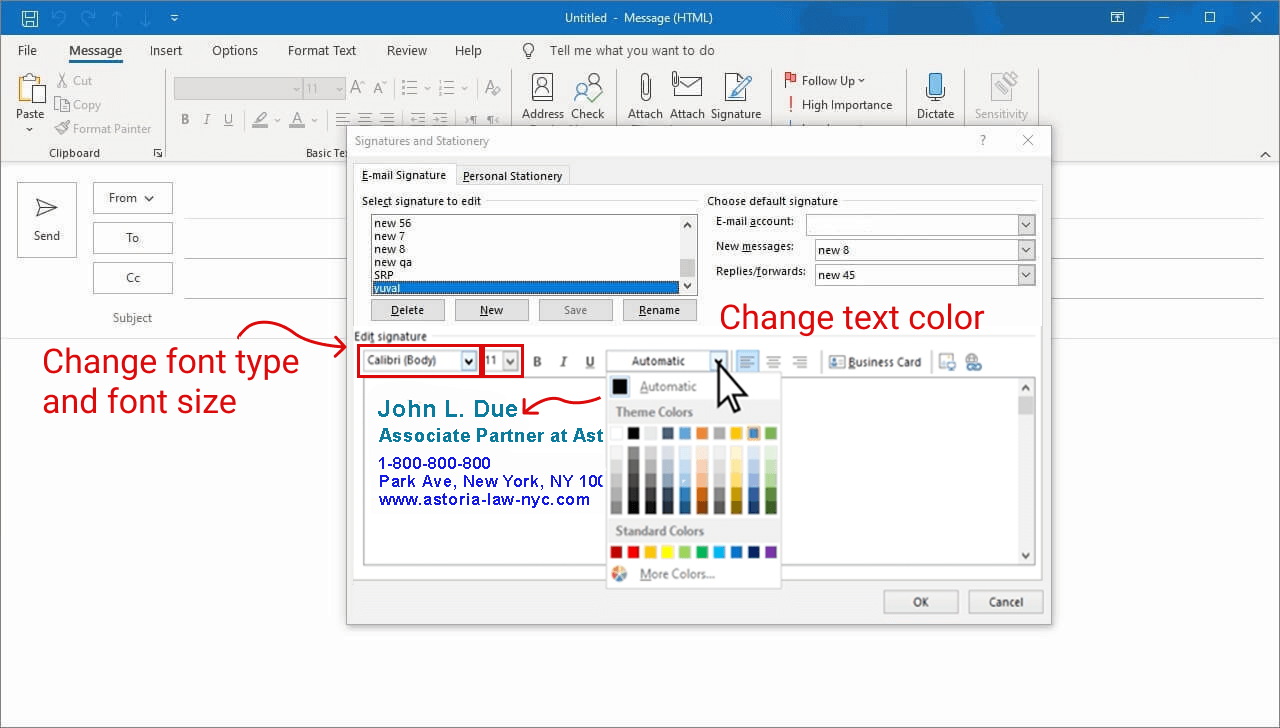
Improve your Outlook signature by organizing it and creating a clear visual hierarchy. Use different colors and font sizes to highlight important information.
- To change the color of the text in your signature, select it and choose a color from the Color dropdown menu or pick a custom color from More Colors.
- In the same way, to change the text size, select the text and experiment with different sizes from the Font Size dropdown menu until you find the right balance.
- Finally, to change the font type, select the text and try different options from the Font type dropdown until you find the one that suits you.
5) Add a hyperlink to your Outlook signature
To add a hyperlink to your Outlook signature:
- Select text, and it will appear with a grey background.
- Click the link icon on the right-hand side.
- Enter the desired URL and click OK.
- Make your telephone number and local address clickable.
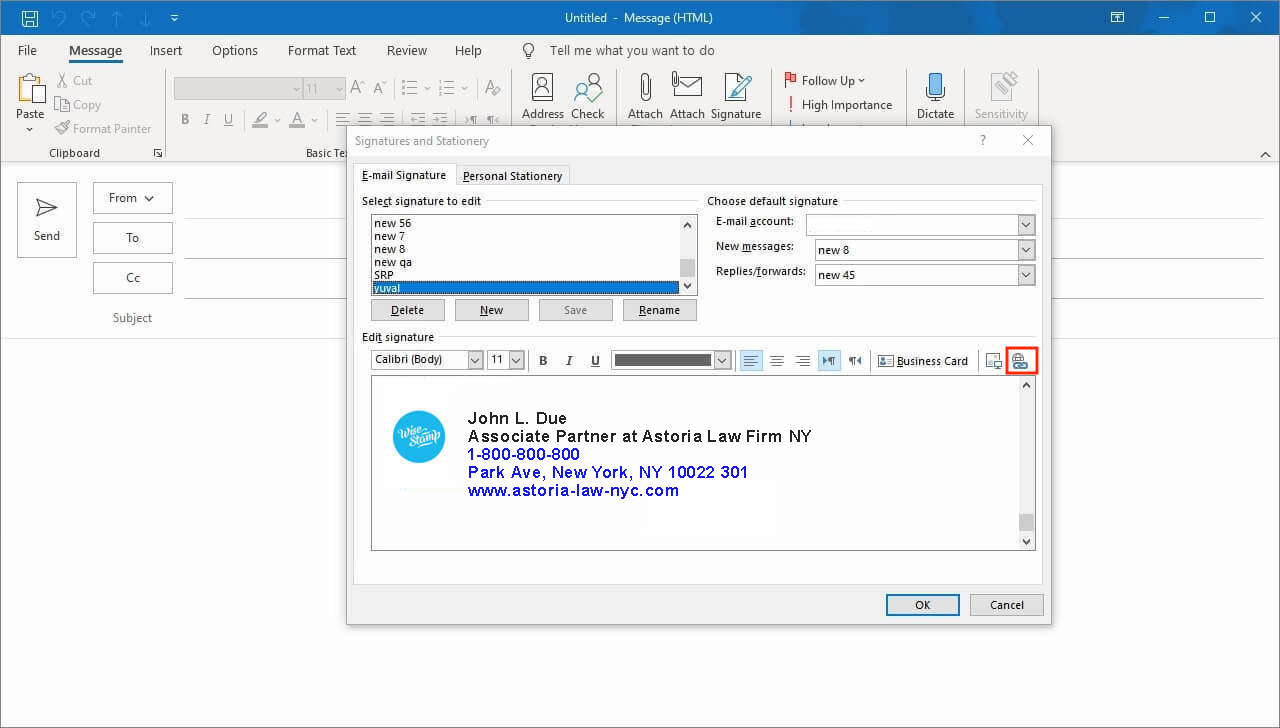
6) Add an image
To place your signature image:
- Click where you want to put it.
- Find and click the image icon on the right side of the toolbar.
- Upload the image from your computer.
Resize the image: To change the size of your image, click on it and drag the black squares at the corners to match your preferred signature design.
Make your image clickable: To link an image,
- Select the image with your cursor.
- Click the link icon in the toolbar.
- Insert the desired URL for the image link.
- Click “OK”.
Add social media icons and links:To include social media icons, follow the same steps as adding an image with a link. Just add them as images, move them to the desired position, select the icon, and click the link button to assign the link to your social media page.
7) Set auto Outlook signatures
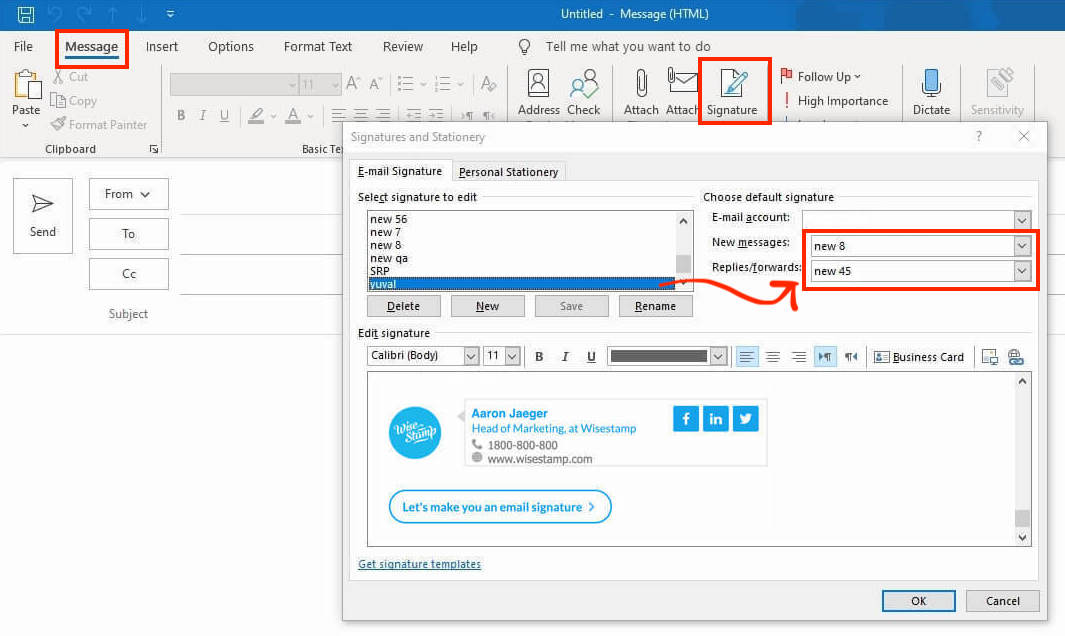
To have a signature in Outlook, you can choose whether you want it in your new messages and forward and reply. It’s easy to set up:
- Go to the top-right corner of your Outlook editor. You’ll see two dropdown menus: one for setting an auto signature for new messages and one for forward/reply messages. Each menu should contain all your available signatures.
- Choose the signature you wish to appear for each message type: After creating your Outlook signature, save your work by clicking “OK.” To view your new signature in Outlook, open a new message, which will be displayed at the bottom.
- Easily handle your signatures from the Message window. Just click the “Signature” button on the top ribbon. Choose the signature you want for each email.
How to Add a Signature on Outlook for Mac Desktop
- To open Outlook, go to the tools menu and click on preferences.
- Then, select ‘signatures’.
- Click the ‘+’ button to create a new signature and choose edit.
- Paste your new signature and save it.
- Finally, preview your signature to ensure everything is correct.
How to Add a Signature on the Outlook365 Web App
- To access your account settings, click the gear icon in the top right corner.
- Then, search for “signature” in the search box within the Settings panel.
- Choose the result that says “Email signature.”
- Create a new signature using the signature editor provided in the application.
- Finally, save your changes by clicking “Save.”
How to Create a Signature on the Android & iOS App
Having a signature in the Outlook mobile app (on Android or iOS) is crucial for professionals who are always on the go. It helps showcase your branding and professionalism in every email you send from your mobile device.
- Open the mobile app.
- Tap your account image in the top left corner.
- Tap the gear icon at the bottom left to access Outlook settings.
- Select “Signature”.
- Enter your information.
- Tap the checkmark on the top right to finish setting up.
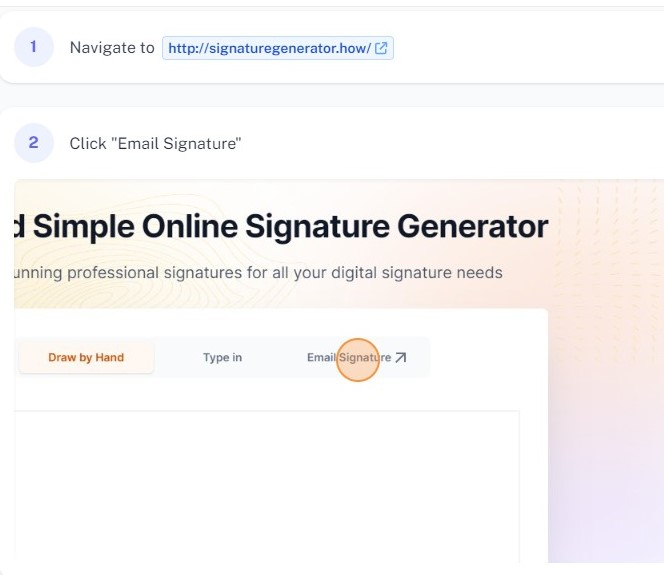
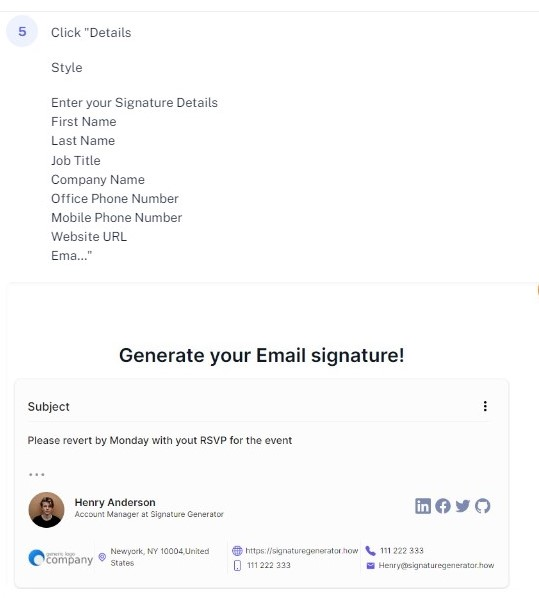
Generate your Outlook signature with Signature Generator
Signature Generator is a handy tool that lets you easily create professional and personalized email signatures. With various templates and customization options, you can ensure your signature represents your brand and stands out.
Just input your details and select your preferred style, and the generator will do the rest, creating a signature ready to be copied and pasted into Outlook.
Let’s now go through the easy steps together:
a) You go to the Signature Generator website and click ‘Email Signature.’
b) Fill in the signature details in respective boxes like first name, last name, job title, etc.
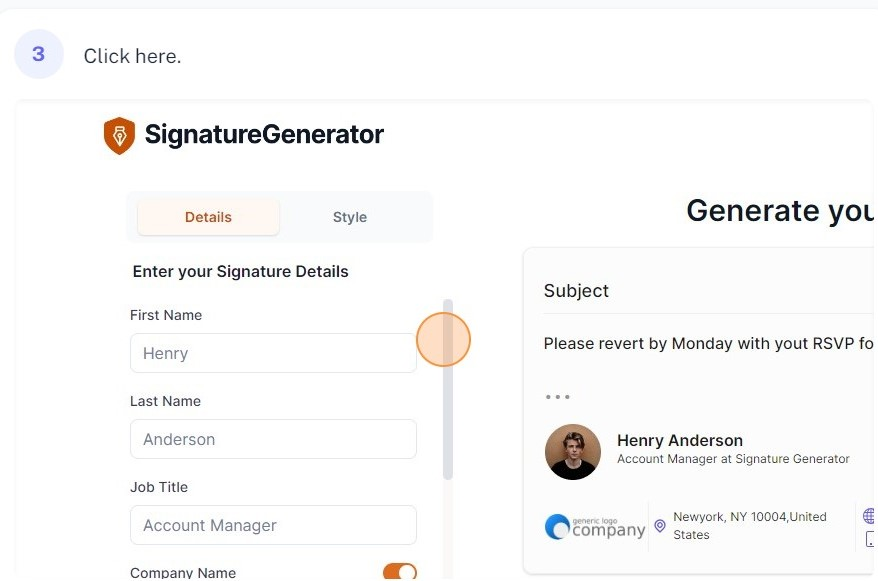
c) Upload your pic and link your LinkedIn, Facebook, Twitter, and Instagram accounts if required.

d) You can generate your email signature once you complete filling in all the details.
Summing Up
Adding a signature in Outlook is a simple yet pivotal part of establishing a professional image in your correspondence.
The steps outlined in this guide make the process easy and efficient, whether using the desktop version of Outlook, the mobile app, or a useful tool like Signature Generator. Adopt these methods to create a personal and professional touch in your emails.
With a well-designed signature, you can make a lasting impression on your recipients and enhance your brand image. Cheers! So, why wait? Start creating your personalized signature today! Happy emailing with Signature Generator!
FAQs
1) Can I create multiple signatures in Outlook?
You can create multiple signatures in Outlook and use them for different types of emails.
2) Is it possible to add images or logos in my signature?
With Signature Generator, you can upload your company logo or any other image to customize your signature.
3) Can I change my signature anytime?
You can change or update your signature anytime by following the steps mentioned in this guide.
4) Can I add social media links to my signature?
With Signature Generator, you can easily add links to your LinkedIn, Twitter, Facebook, and Instagram profiles for better networking opportunities.
5) Is using a tool like Signature Generator safe?
Signature Generator is a secure platform that ensures the safety of your data and allows you to create professional signatures hassle-free. So, add some personality to your emails with an impressive signature!